DIY Solar Generator
I wanted a way to charge phones, ham radios, flashlights, power small appliances and do it with just the power of the sun. There are many off the shelf solar generators. I considered one from Goal Zero, but decided to do it myself.
Why build your own solar generator? I like to understand each component, make it just the way I want it and save money. If something goes wrong with it, I'll know how to fix it or how to cannibalize the parts. If the solar controller is fried, it is easy to rip the inverter out and hook it up to a car - try that with a Goal Zero. Don't get me wrong, I'm sure they make great stuff, but if it breaks I'm not likely to be able to fix it myself. A DIY solar generator is made from off the shelf parts that you can replace or upgrade yourself.
This project, Solar Rolr, has been used to run a CPAP machine all night. It looked like it would be able to for 2-3 nights without being recharged. With a 100 watt panel and good sun it should be able to run a small 12v fridge all day.
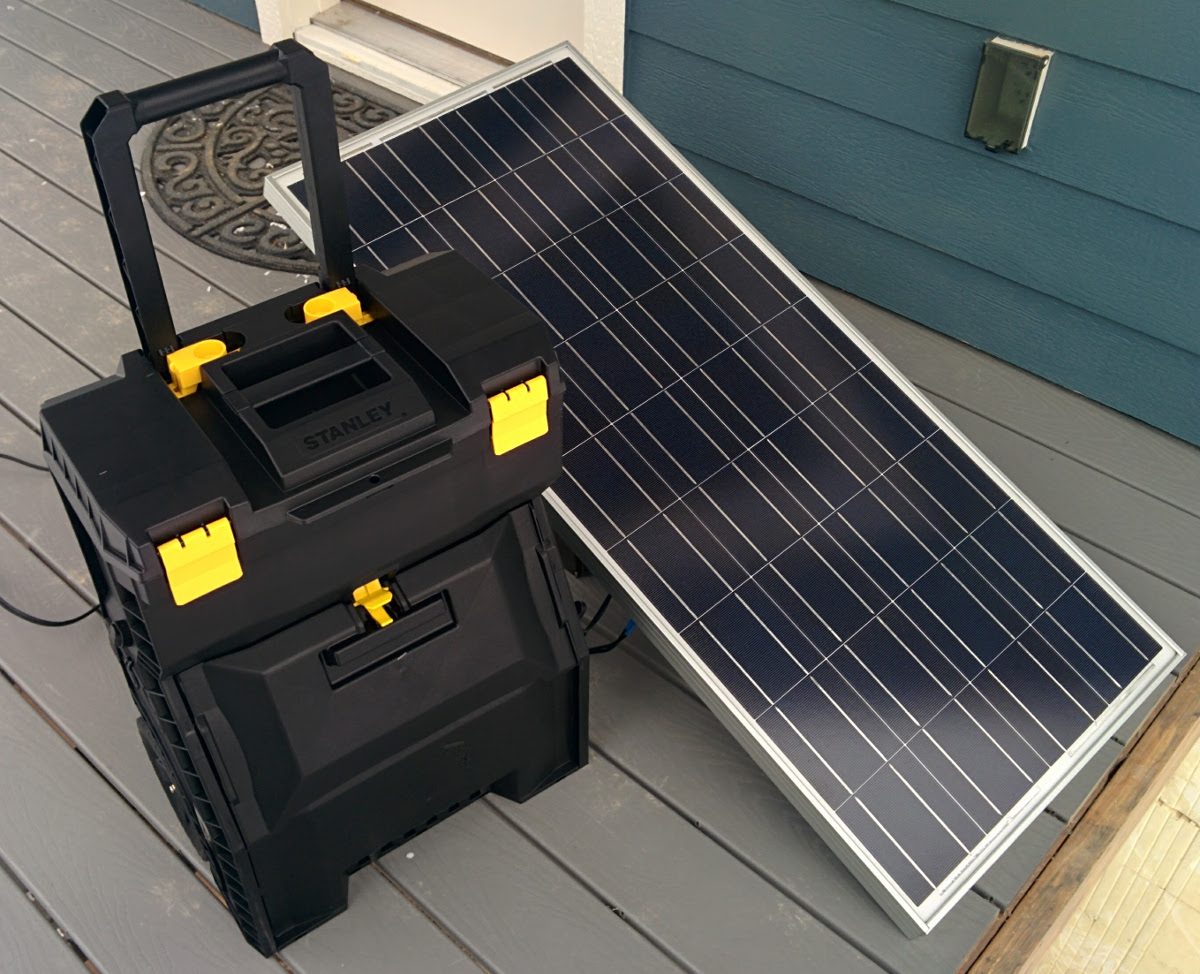
The Solar Rolr next to a 100w solar panel.
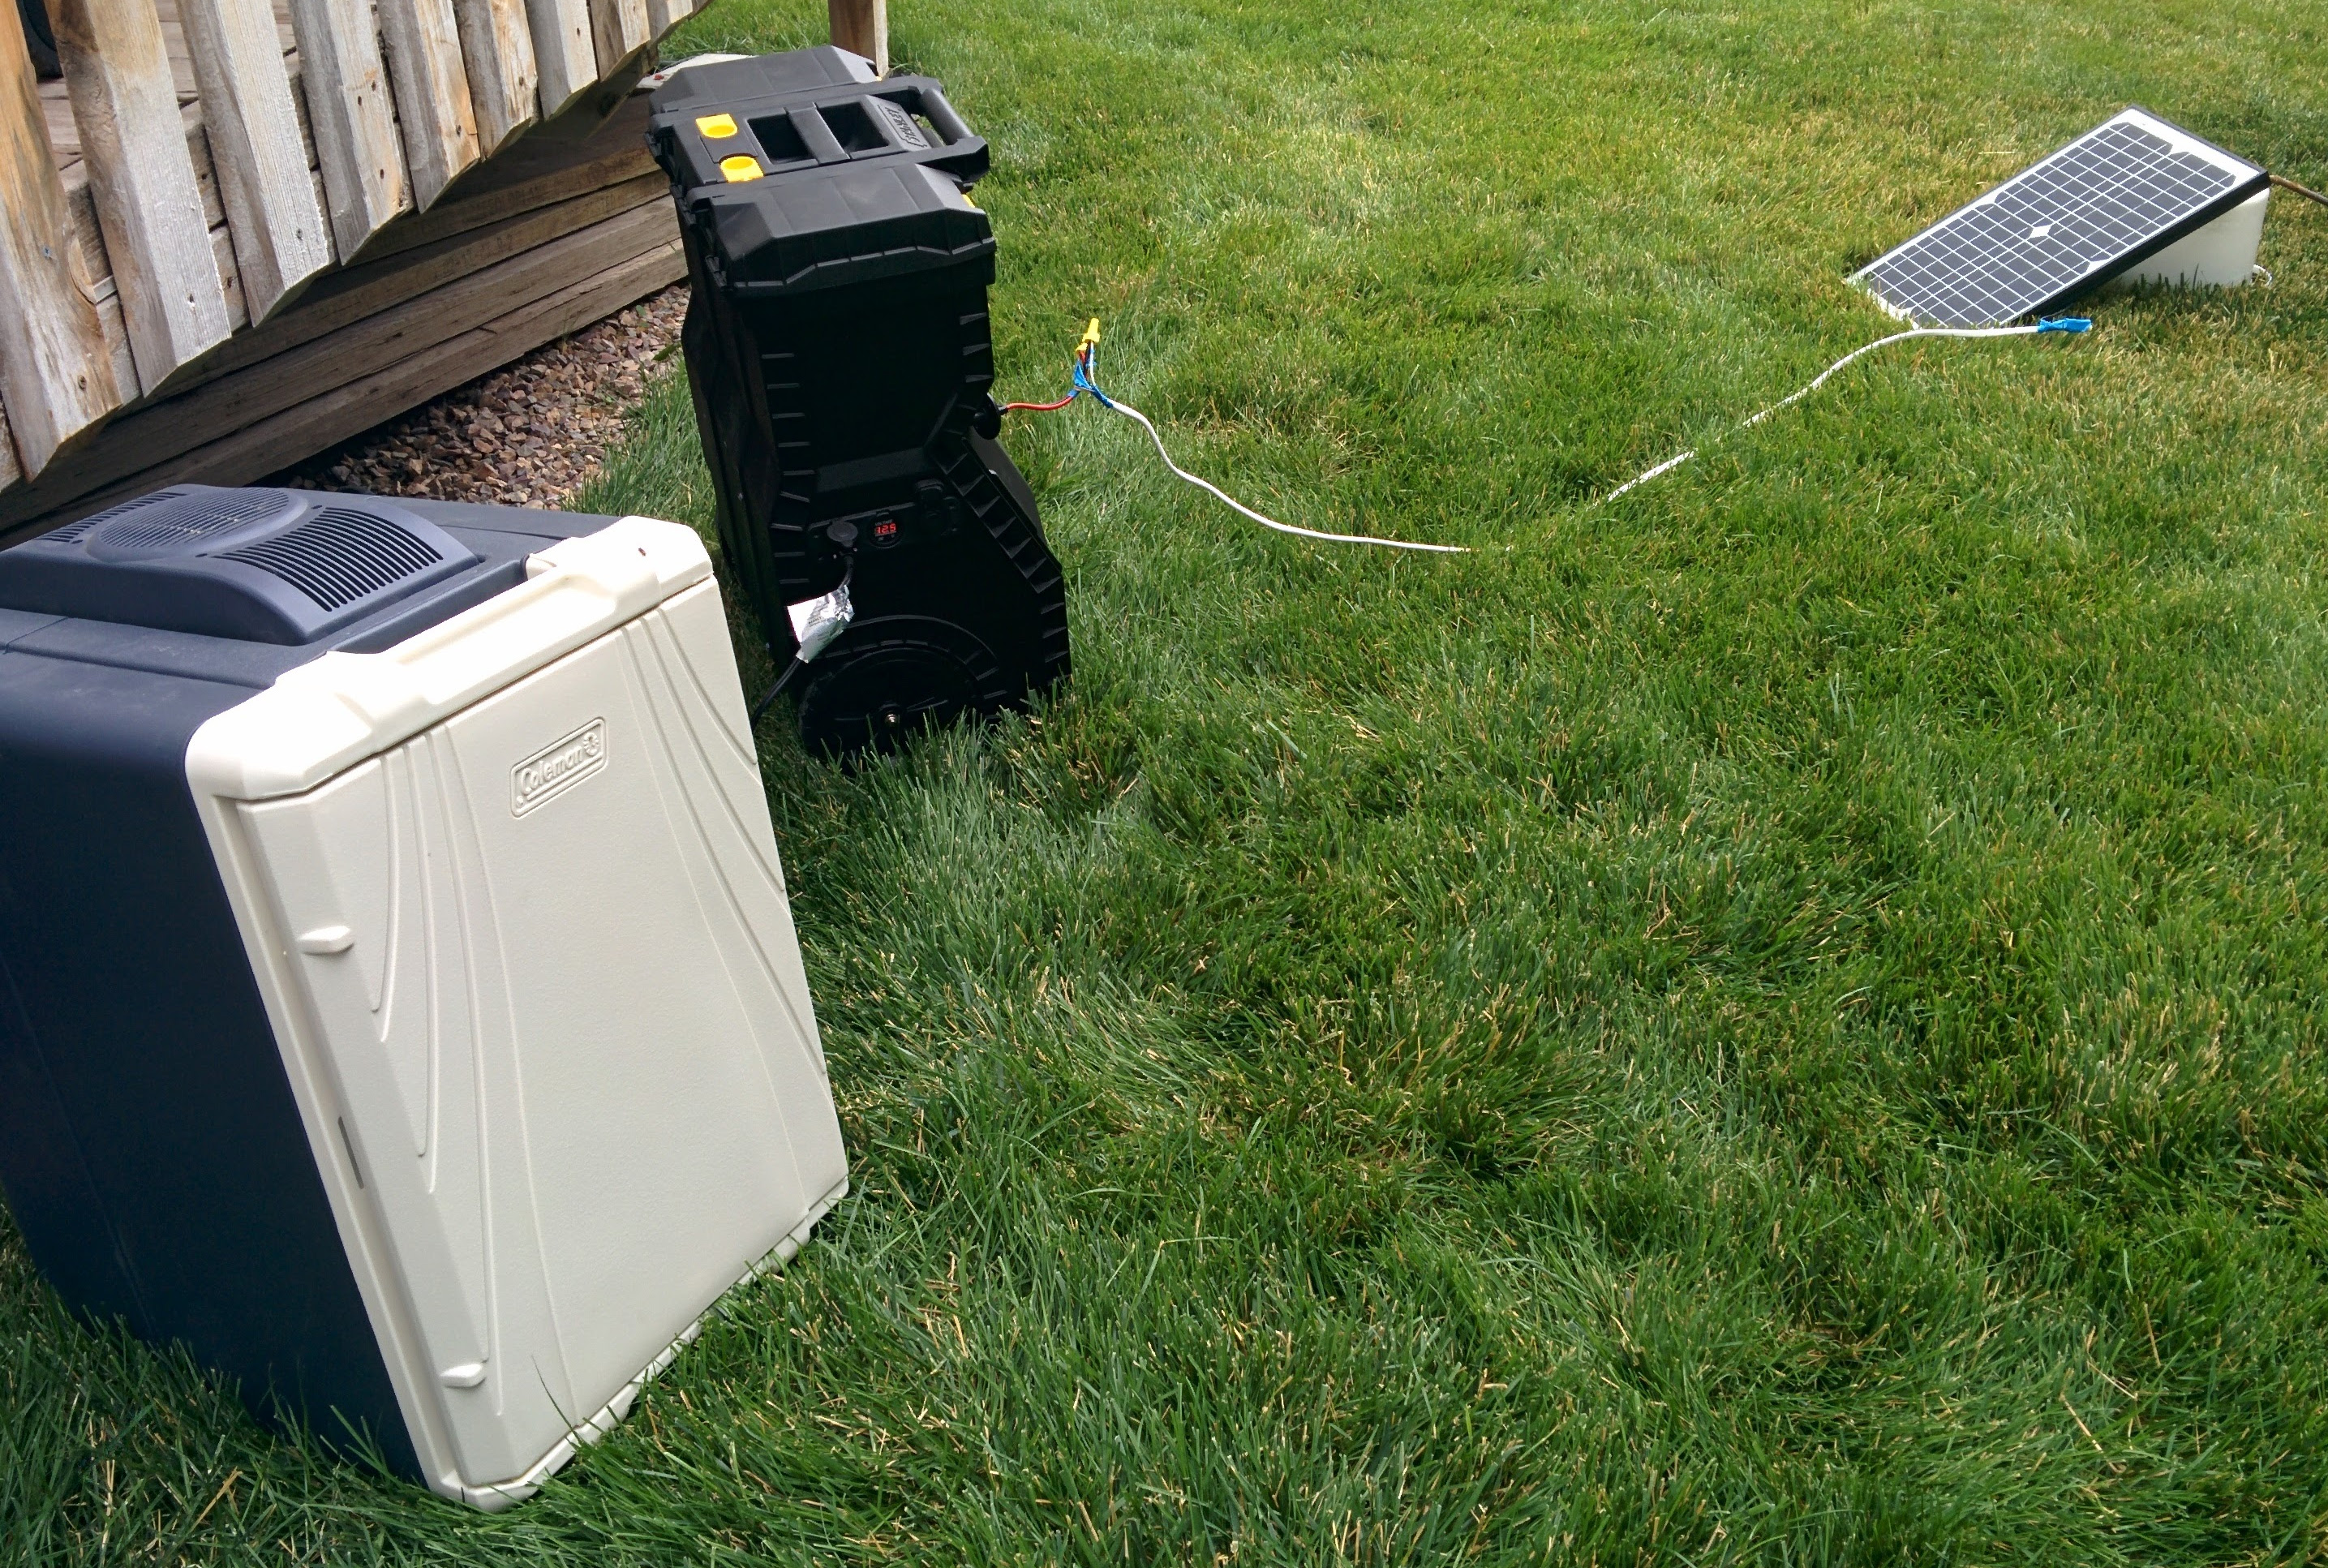
The Solar Rolr with a 20w panel and 12v fridge.
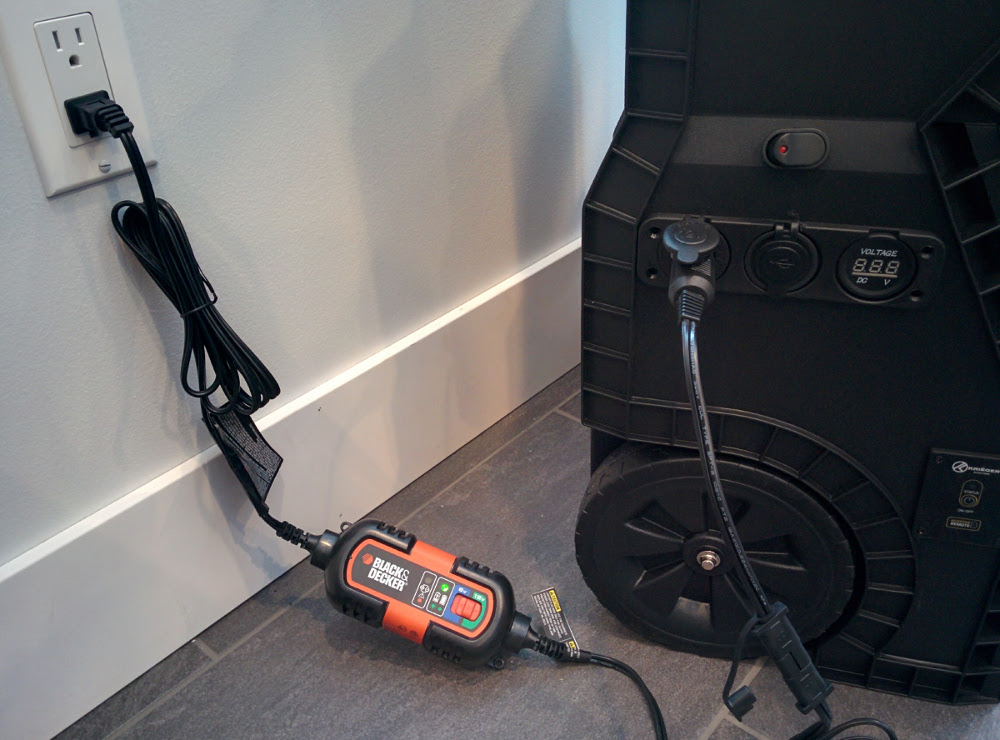
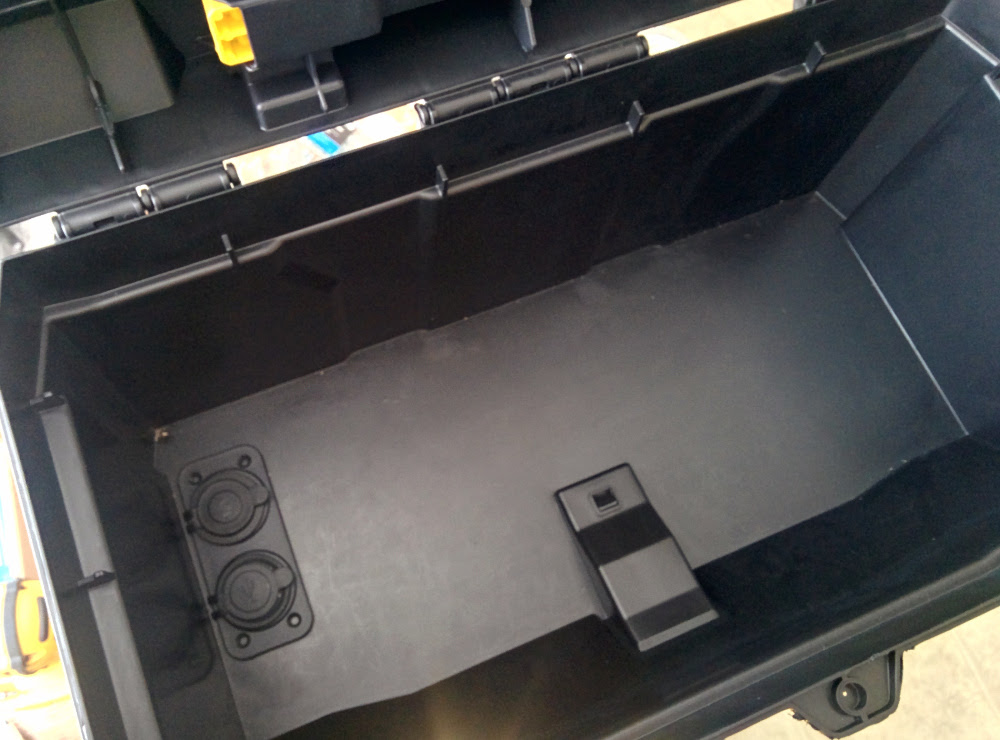
The 12v outlet is fused, but not switched (like everything else). That way I can use the 12v port to hook up the battery maintainer. On this side: low voltage power switch (top), 12v port, USB ports, voltage meter (middle row), inverter switch (lower).
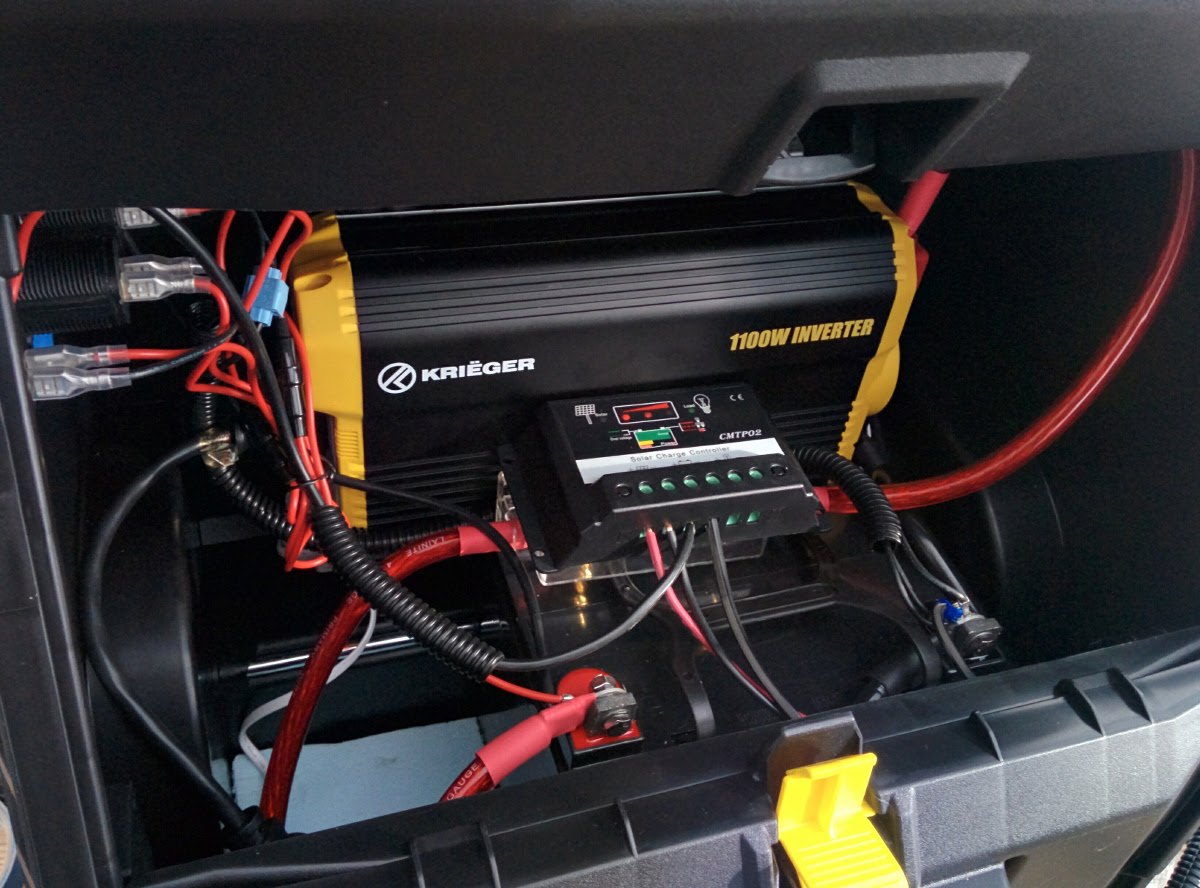
I drilled all the holes in the side and back, mounted the Krieger 1100w inverter to the back of the toolbox, installed the battery and got the cables to the inverter hooked up and then took care of the smaller wiring.
 There is a 12v outlet and USB outlets in the top toolbox compartment. That way I can plug in a battery bank or charger and leave it in the top of the box.
The Parts
- Rolling tool box - There are smaller boxes that all of this can fit into, but I chose the Stanley Mobile Work Center because I could fit the inverter, battery and all the "generator" components in the bottom and have a toolbox with a lift out tray to organize spare chargers, cords, cables, adapters, flashlights, USB/LED lights, radios, etc. I know I can grab this and have everything I need. I wouldn't recommend this box as a toolbox - it falls over backwards unless you have something heavy in the bottom of it. For this project, the battery is plenty of weight to keep it upright. I like the wheels and handle, even my kids can move it around the house.
- Inverter - I went with an 1100 watt inverter in hopes that I could power something up to the size of a refrigerator. It works for mine, but that doesn't mean it will power yours. KRIEGER had great reviews on amazon, comes with the heavy battery cables and the remote switch to turn it off and on.
- Charge Controller - I found the cheapest one I could - with decent reviews. It is 12 volts and it works. There are a lot of options here.
- Outlets - 12v/USB outlet combos are easy to find and install. Drill a hole and hook them up. I was going to mount a 110v outlet on the side of the box, but in the end I opted for a cheaper, easier 1' extension cord. With the inverter mounted to the back of the box, you don't really want to have to reach in there and try to plug something in. The 1' cord makes it easy to reach.
- Battery Maintainer - This is another area where you have a lot of options, or maybe you have one laying around. I liked the Black & Decker one I picked because it comes with three different ways to connect it.
- Solar panel - The small 20 watt one I played around with works, but I'd get something bigger, at least 100 watts if you can. A pair of 100 watt panels hinged together so they fold up for transport would be slick.
- Misc - This is a DIY project, so wire, connectors, screws, drill bits, etc. I used whatever I had in my garage. You are on your own, but you wouldn't be looking at a DIY project if that bothered you.